1. How to Find Serum’s Presets Folder
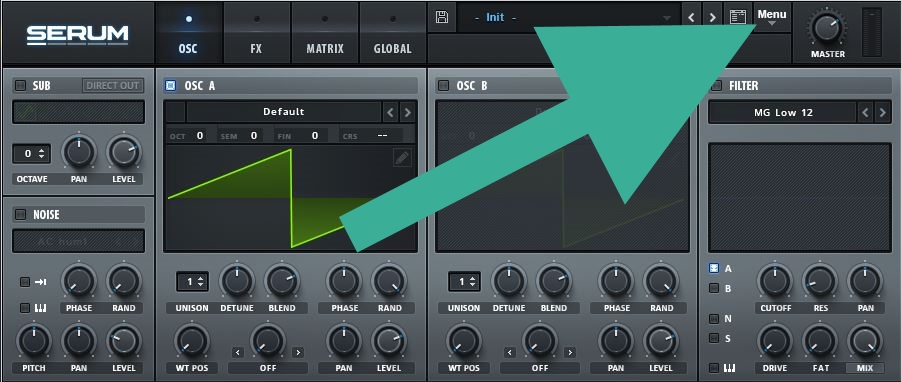
The first good news: you don’t have to close your DAW. Simply navigate to Serum’s Menu in the top-right, and select Show Serum Presets Folder.
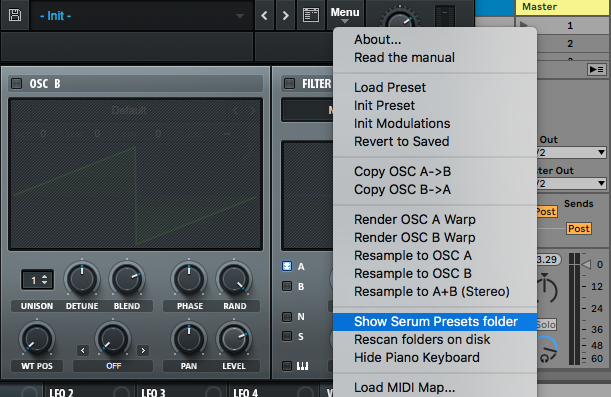
Your OS’s file browser will open up at the correct system folder containing Serum’s factory presets.
2. How to Add your New Serum Presets
All Serum presets have the file extension FXP – regardless of whether you’re on Mac or PC.
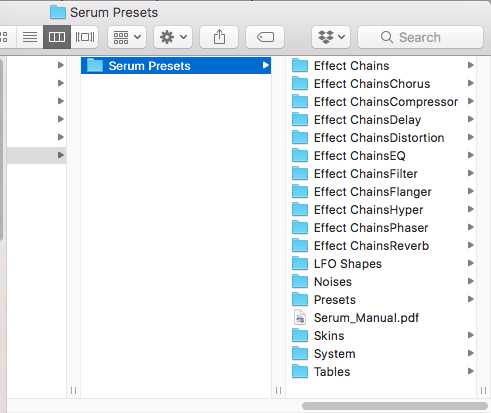
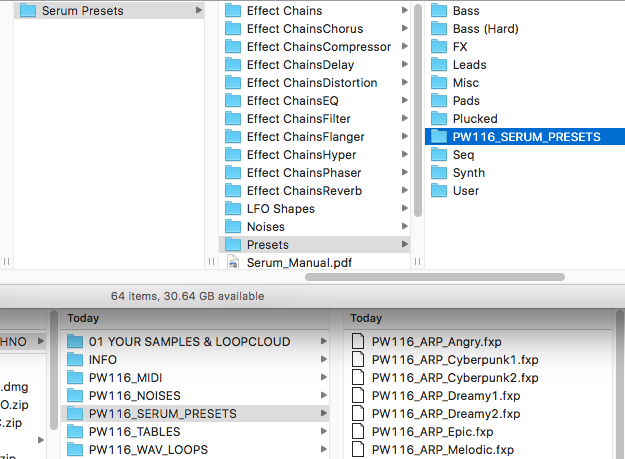
Now we can copy or move the entire new folder from our Downloads into the Serum Presets folder that we opened via Serum, in the ‘Presets’ folder, as shown here.
When we return to Serum, go back to the same menu and select Rescan folders on disk.
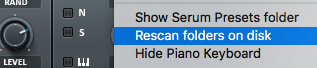
Our new presets now show up alongside Serum’s Factory bank.
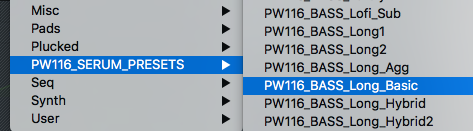
It’s worth renaming the folder to something more relevant. You can do this using your OS file browser, and Rescan the folder in Serum once again for this to take effect. See our notes about how best to organise your Serum presets at the end of this article for more info.
3. Installing Serum Noises, Wavetables and LFOs
With your presets installed, sometimes the newly-created wavetables, noises and LFOs, made by the sound designer will be installed as part of the FXP patch, but sometimes not.
If your preset fails to produce noise when loaded, you may need to load the required wavetables into Serum as well. Serum can also bring up an error message when it can’t find a certain element, as shown below.
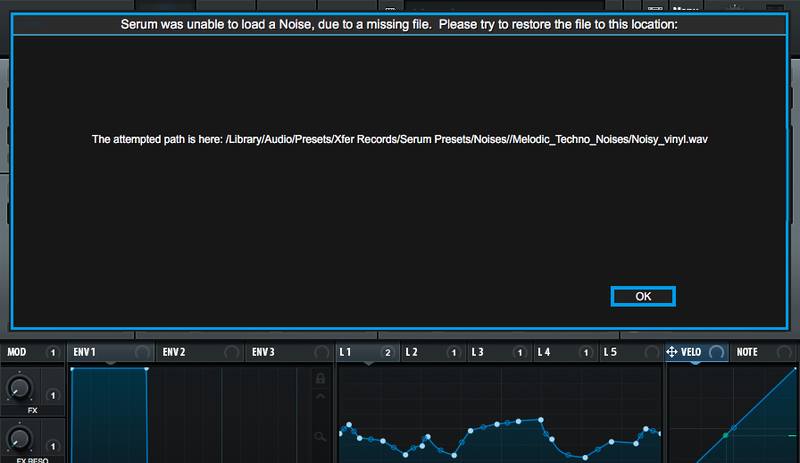
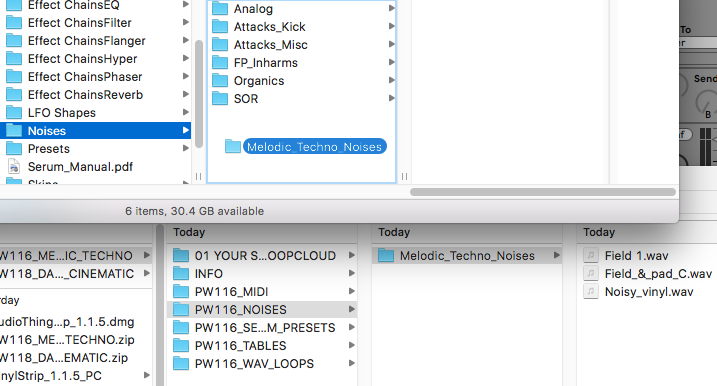
In this case, your downloaded preset pack should contain custom wavetables, noises and/or LFOs to drag into Serum’s other preset folders. Depending on the developer, the destination could be in the User folder for the Noise, Wavetable or other element, but the most likely way to get the sound working is to simply drag the included folder straight into the relevant directory in Serum. Don’t forget to Rescan folders on disk after this.
4. Using Imported Wavetables, LFO Shapes and Noises in your own Serum Patches
Once any Noises, ‘Tables’, and LFO Shapes are imported into Serum, you can also freely bring them into any patch you’re working on elsewhere.
5. Organising your Third-Party Serum Presets
Remember that Serum can’t access folders within folders, so if you do attempt to install your third-party packs within the User folder, you can only drag the individual FXP presets in – only one layer of folders will ever be visible, and that’s the top layer with ‘Serum Presets’
Serum. Как установить пресеты?
Скачивая пресеты Serum у некоторых возникает вопрос, а как установить данные пресеты, чтобы они отображались в синтезаторе и полноценно работали в вашей DAW. Разберёмся в этом вопросе.
Serum. Как установить пресеты?
Шаг 1.
Скачивая пресеты, первое, на что вы должны обратить внимание — версия, для которой созданы данные пресеты. Иначе после установки они будут отображаться в папке Serum, но загружаться, то есть работать не будут.

Все пресеты на сайте NSS созданы для версии Serum 1.334 и выше.
 Все пресеты на сайте NSS созданы для версии Serum 1.334 и выше.
Шаг 2.
Версия подходит. Отлично. Скачиваем нужный пресет.
Если вы скачиваете его с нашего сайта. То алгоритм следующий:


Шаг 3.

Теперь мы открываем папку Serum, где находятся пресеты. Путь следующий:
Мой компьютер/C/Пользователи/ имя пользователя /Мои документы/Xfer/Serum Presets/Presets
У вас откроется следующее окно:

Шаг 4.
Перезагружаем DAW. Запускаем SERUM и находим наш пресет.
Всем удачи в творчестве!
Спасибо, что читаете New Style Sound ( RSS-лента ). Подписывайтесь на новости или RSS и делитесь статьями с друзьями. Что такое RSS ( читать ). Скачивайте также бесплатные плагины на сайте.
How To Install Serum Presets on Mac & Windows
Home » Blog » How To Install Serum Presets on Mac & Windows
Table of Contents
Serum is probably the most popular VST synth of our time. It sounds great, looks stunning, is easy to understand, plus there are plenty of Serum presets and skins available. Since not everyone knows how to install Serum presets I decided to write this tutorial for you guys.
Fortunately, it doesn’t matter if you’re using Mac or Windows, Ableton or FL Studio.
The process is always the same!
Open Serum’s Presets Folder
Start by opening Serum.
Now go to the menu in the top right corner and click “Show Serum Presets folder”.
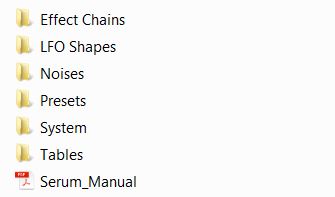
You should see these folders (this screenshot is a bit old by now, so you should see some additional ones):
If you can NOT find Serum’s preset folder there’s a good chance you haven’t installed a legit license, so make sure to purchase one. It’s worth it 😉
Paste Your New Presets
Now paste the pack you’d like to install in the presets folder. Some preset banks may come with additional LFO shapes, noises, wavetables or skins. Just drag each of those categories in the matching folder, too. Wavetables go to “Tables”, noises go into “Noises” and so on.
Have fun
Go ahead and open Serum. You’ll find all patches in Serum’s browser. If you can’t open some of the presets you probably haven’t installed the latest update yet.
..and this is how to install Serum presets! Easy, right? 😉


