Nested paging virtualbox что это
OracleВ® VM VirtualBox
Administrator’s Guide for Release 6.0

3.7.В Nested Paging and VPIDs
In addition to normal hardware virtualization, your processor may also support the following additional sophisticated techniques:
Nested paging implements some memory management in hardware, which can greatly accelerate hardware virtualization since these tasks no longer need to be performed by the virtualization software.
With nested paging, the hardware provides another level of indirection when translating linear to physical addresses. Page tables function as before, but linear addresses are now translated to «guest physical» addresses first and not physical addresses directly. A new set of paging registers now exists under the traditional paging mechanism and translates from guest physical addresses to host physical addresses, which are used to access memory.
Nested paging eliminates the overhead caused by VM exits and page table accesses. In essence, with nested page tables the guest can handle paging without intervention from the hypervisor. Nested paging thus significantly improves virtualization performance.
On AMD processors, nested paging has been available starting with the Barcelona (K10) architecture. They now call it rapid virtualization indexing (RVI). Intel added support for nested paging, which they call extended page tables (EPT), with their Core i7 (Nehalem) processors.
If you have an Intel CPU with EPT, please consult Section 6.4.1, “CVE-2018-3646” for security concerns regarding EPT.
On Intel CPUs, a hardware feature called Virtual Processor Identifiers (VPIDs) can greatly accelerate context switching by reducing the need for expensive flushing of the processor’s Translation Lookaside Buffers (TLBs).
Copyright В© 2004, 2020 Oracle and/or its affiliates. All rights reserved. Legal Notices
Nested paging virtualbox что это
Программное обеспечение в виртуальной машине выполняется непосредственно на процессоре главного компьютера, в то же время VirtualBox использует набор сложных методик, чтобы не допустить операций, которые вмешались бы в работу хоста.
Существует два способа, которыми VirtualBox реализует «виртуализацию»: полностью программный способ или аппаратный используя специальные аппаратные возможности современных процессоров.
Примечание
На большинстве систем, сначало необходимо включить поддержку аппаратной виртуализацию в BIOS чтобы VirtualBox смог ее использовать
Вы можете указать для каждой виртуальной машины индивидуально, должен ли VirtualBox использовать программный или аппаратный способ виртуализации. До версии 2.2 программная виртуализация была значением по умолчанию; начинаясь с версии 2.2, VirtualBox устанавливает аппаратную виртуализацию по умолчанию для новых виртуальных машин, которых вы создаете. (Для уже существующих виртуальных машин смена режима автоматически не происходит, по причинам совместимости, и установленное значение по умолчанию может быть изменено для каждой виртуальной машины.)
Включение апаратной вертуализации необходимо только в двух случаях:
Установка аппаратной виртуализации по умолчанию, вызвана тем что, технологии виртуализации Intel, ADM и VirtualBox значительно улучшились, и аппаратная виртуализация в большинстве случаях производительнее программной.
Предупреждение
Не работайте одновременно с другими гипервизорами (программами исполнения виртуальных машин) (open-source or commercial virtualization products) с VirtualBox! Несколько гипервизоров могут обычно устанавливаться параллельно на одной системе, но не пытайтесь выполнить несколько виртуальных машин на различных гипервизоров в одно и то же время. VirtualBox не может проследить за тем, что другой гипервизор пытается сделать на том же самой системе, и особенно если они одновременно пытаются использовать возможности аппаратной виртуализации, такие как VT-X, что может превести к краху всей системы.
Кроме «базовой» аппаратной виртуализации, ваш процессор может поддерживать дополнительные технологии: [1]
На AMD процессорах, nested paging стала доступна начиная с архитектуры Barcelona (K10) ; Intel добавила поддержку nested paging, которую она назвала «extended page tables» (EPT), в свих процессорах Core i7 (Nehalem).
Технология Nested paging не устанавливается по умолчанию, но она может быть установлена отдельно для каждой ВМ.
Если ваш компьютер поддерживает nested paging (AMD-V) or EPT (VT-x), то вы можете получить значительный прирост производительности используя эту технологию.
[1] Поддержка AMD nested paging добавлена в VirtualBox 2.0 ; поддержка Intel EPT и VPIDs добавлена в версии 2.1.
Nested paging virtualbox что это
10.1. Where Oracle VM VirtualBox Stores its Files
In Oracle VM VirtualBox, a virtual machine and its settings are described in a virtual machine settings file in XML format. In addition, most virtual machines have one or more virtual hard disks. These are typically represented by disk images, such as those in VDI format. The location of these files may vary, depending on the host operating system. See Section 10.1.1, “The Machine Folder”.
Global configuration data for Oracle VM VirtualBox is maintained in another location on the host. See Section 10.1.2, “Global Settings”.
10.1.1. The Machine Folder
As an example, when you create a virtual machine called «Example VM», Oracle VM VirtualBox creates the following:
In the machine folder, a settings file: Example VM.vbox
You can change the default machine folder by selecting Preferences from the File menu in the Oracle VM VirtualBox main window. Then, in the displayed window, click on the General tab. Alternatively, use the VBoxManage setproperty machinefolder command. See Section 8.29, “VBoxManage setproperty”.
10.1.2. Global Settings
In addition to the files for the virtual machines, Oracle VM VirtualBox maintains global configuration data in the following directory:
Oracle VM VirtualBox creates this configuration directory automatically, if necessary. You can specify an alternate configuration directory by either setting the VBOX_USER_HOME environment variable, or on Linux or Oracle Solaris by using the standard XDG_CONFIG_HOME variable. Since the global VirtualBox.xml settings file points to all other configuration files, this enables switching between several Oracle VM VirtualBox configurations.
10.1.3. Summary of Configuration Data Locations
The following table gives a brief overview of the configuration data locations on an Oracle VM VirtualBox host.
Table 10.1. Configuration File Locations
Setting
Location
Default machines folder
Default disk image location
In each machine’s folder
Machine settings file extension
Each machine settings file
Media registration is done automatically when a storage medium is attached to a VM
10.1.4. Oracle VM VirtualBox XML Files
All Oracle VM VirtualBox XML files are versioned. When a new settings file is created, for example because a new virtual machine is created, Oracle VM VirtualBox automatically uses the settings format of the current Oracle VM VirtualBox version. These files may not be readable if you downgrade to an earlier version of Oracle VM VirtualBox. However, when Oracle VM VirtualBox encounters a settings file from an earlier version, such as after upgrading Oracle VM VirtualBox, it attempts to preserve the settings format as much as possible. It will only silently upgrade the settings format if the current settings cannot be expressed in the old format, for example because you enabled a feature that was not present in an earlier version of Oracle VM VirtualBox.
In such cases, Oracle VM VirtualBox backs up the old settings file in the virtual machine’s configuration directory. If you need to go back to the earlier version of Oracle VM VirtualBox, then you will need to manually copy these backup files back.
We intentionally do not document the specifications of the Oracle VM VirtualBox XML files, as we must reserve the right to modify them in the future. We therefore strongly suggest that you do not edit these files manually. Oracle VM VirtualBox provides complete access to its configuration data through its the VBoxManage command line tool, see Chapter 8, VBoxManage and its API, see Chapter 11, Oracle VM VirtualBox Programming Interfaces.
10.2. Oracle VM VirtualBox Executables and Components
Oracle VM VirtualBox was designed to be modular and flexible. When the Oracle VM VirtualBox graphical user interface (GUI) is opened and a VM is started, at least the following three processes are running:
When we refer to clients here, we mean the local clients of a particular VBoxSVC server process, not clients in a network. Oracle VM VirtualBox employs its own client/server design to allow its processes to cooperate, but all these processes run under the same user account on the host operating system, and this is totally transparent to the user.
Any Oracle VM VirtualBox front-end, or client, will communicate with the service process and can both control and reflect the current state. For example, either the VM selector or the VM window or VBoxManage can be used to pause the running VM, and other components will always reflect the changed state.
The Oracle VM VirtualBox GUI application is only one of several available front ends, or clients. The complete list shipped with Oracle VM VirtualBox is as follows:
VirtualBoxVM : The Qt front end implementing the VirtualBox Manager and running VMs.
VBoxManage : A less user-friendly but more powerful alternative. See Chapter 8, VBoxManage.
VBoxHeadless : A VM front end which does not directly provide any video output and keyboard or mouse input, but enables redirection through the VirtualBox Remote Desktop Extension. See Section 7.1.2, “VBoxHeadless, the Remote Desktop Server”.
vboxwebsrv : The Oracle VM VirtualBox web service process which enables control of an Oracle VM VirtualBox host remotely. This is described in detail in the Oracle VM VirtualBox Software Development Kit (SDK) reference. See Chapter 11, Oracle VM VirtualBox Programming Interfaces.
Internally, Oracle VM VirtualBox consists of many more or less separate components. You may encounter these when analyzing Oracle VM VirtualBox internal error messages or log files. These include the following:
IPRT: A portable runtime library which abstracts file access, threading, and string manipulation. Whenever Oracle VM VirtualBox accesses host operating features, it does so through this library for cross-platform portability.
VMM (Virtual Machine Monitor): The heart of the hypervisor.
EM (Execution Manager): Controls execution of guest code.
TRPM (Trap Manager): Intercepts and processes guest traps and exceptions.
HM (Hardware Acceleration Manager): Provides support for VT-x and AMD-V.
GIM (Guest Interface Manager): Provides support for various paravirtualization interfaces to the guest.
PDM (Pluggable Device Manager): An abstract interface between the VMM and emulated devices which separates device implementations from VMM internals and makes it easy to add new emulated devices. Through PDM, third-party developers can add new virtual devices to Oracle VM VirtualBox without having to change Oracle VM VirtualBox itself.
PGM (Page Manager): A component that controls guest paging.
TM (Time Manager): Handles timers and all aspects of time inside guests.
CFGM (Configuration Manager): Provides a tree structure which holds configuration settings for the VM and all emulated devices.
SSM (Saved State Manager): Saves and loads VM state.
VUSB (Virtual USB): A USB layer which separates emulated USB controllers from the controllers on the host and from USB devices. This component also enables remote USB.
DBGF (Debug Facility): A built-in VM debugger.
Oracle VM VirtualBox emulates a number of devices to provide the hardware environment that various guests need. Most of these are standard devices found in many PC compatible machines and widely supported by guest operating systems. For network and storage devices in particular, there are several options for the emulated devices to access the underlying hardware. These devices are managed by PDM.
Guest Additions for various guest operating systems. This is code that is installed from within a virtual machine. See Chapter 4, Guest Additions.
The «Main» component is special. It ties all the above bits together and is the only public API that Oracle VM VirtualBox provides. All the client processes listed above use only this API and never access the hypervisor components directly. As a result, third-party applications that use the Oracle VM VirtualBox Main API can rely on the fact that it is always well-tested and that all capabilities of Oracle VM VirtualBox are fully exposed. It is this API that is described in the Oracle VM VirtualBox SDK. See Chapter 11, Oracle VM VirtualBox Programming Interfaces.
10.3. Hardware Virtualization
Oracle VM VirtualBox enables software in the virtual machine to run directly on the processor of the host, but an array of complex techniques is employed to intercept operations that would interfere with your host. Whenever the guest attempts to do something that could be harmful to your computer and its data, Oracle VM VirtualBox steps in and takes action. In particular, for lots of hardware that the guest believes to be accessing, Oracle VM VirtualBox simulates a certain virtual environment according to how you have configured a virtual machine. For example, when the guest attempts to access a hard disk, Oracle VM VirtualBox redirects these requests to whatever you have configured to be the virtual machine’s virtual hard disk. This is normally an image file on your host.
Intel and AMD processors have support for hardware virtualization. This means that these processors can help Oracle VM VirtualBox to intercept potentially dangerous operations that a guest operating system may be attempting and also makes it easier to present virtual hardware to a virtual machine.
These hardware features differ between Intel and AMD processors. Intel named its technology VT-x, AMD calls theirs AMD-V. The Intel and AMD support for virtualization is very different in detail, but not very different in principle.
On many systems, the hardware virtualization features first need to be enabled in the BIOS before Oracle VM VirtualBox can use them.
Enabling hardware virtualization is required in the following scenarios:
Certain rare guest operating systems like OS/2 make use of very esoteric processor instructions. For virtual machines that are configured to use such an operating system, hardware virtualization is enabled automatically.
Oracle VM VirtualBox’s 64-bit guest and multiprocessing (SMP) support both require hardware virtualization to be enabled. This is not much of a limitation since the vast majority of 64-bit and multicore CPUs ship with hardware virtualization. The exceptions to this rule are some legacy Intel and AMD CPUs.
Warning
Do not run other hypervisors, either open source or commercial virtualization products, together with Oracle VM VirtualBox. While several hypervisors can normally be installed in parallel, do not attempt to run several virtual machines from competing hypervisors at the same time. Oracle VM VirtualBox cannot track what another hypervisor is currently attempting to do on the same host, and especially if several products attempt to use hardware virtualization features such as VT-x, this can crash the entire host.
See Section 10.4, “Details About Hardware Virtualization” for a technical discussion of hardware virtualization.
10.4. Details About Hardware Virtualization
With Intel VT-x, there are two distinct modes of CPU operation: VMX root mode and non-root mode.
In root mode, the CPU operates much like older generations of processors without VT-x support. There are four privilege levels, called rings, and the same instruction set is supported, with the addition of several virtualization specific instruction. Root mode is what a host operating system without virtualization uses, and it is also used by a hypervisor when virtualization is active.
In non-root mode, CPU operation is significantly different. There are still four privilege rings and the same instruction set, but a new structure called VMCS (Virtual Machine Control Structure) now controls the CPU operation and determines how certain instructions behave. Non-root mode is where guest systems run.
Switching from root mode to non-root mode is called «VM entry», the switch back is «VM exit». The VMCS includes a guest and host state area which is saved/restored at VM entry and exit. Most importantly, the VMCS controls which guest operations will cause VM exits.
The VMCS provides fairly fine-grained control over what the guests can and cannot do. For example, a hypervisor can allow a guest to write certain bits in shadowed control registers, but not others. This enables efficient virtualization in cases where guests can be allowed to write control bits without disrupting the hypervisor, while preventing them from altering control bits over which the hypervisor needs to retain full control. The VMCS also provides control over interrupt delivery and exceptions.
Whenever an instruction or event causes a VM exit, the VMCS contains information about the exit reason, often with accompanying detail. For example, if a write to the CR0 register causes an exit, the offending instruction is recorded, along with the fact that a write access to a control register caused the exit, and information about source and destination register. Thus the hypervisor can efficiently handle the condition without needing advanced techniques such as CSAM and PATM described above.
VT-x inherently avoids several of the problems which software virtualization faces. The guest has its own completely separate address space not shared with the hypervisor, which eliminates potential clashes. Additionally, guest OS kernel code runs at privilege ring 0 in VMX non-root mode, obviating the problems by running ring 0 code at less privileged levels. For example the SYSENTER instruction can transition to ring 0 without causing problems. Naturally, even at ring 0 in VMX non-root mode, any I/O access by guest code still causes a VM exit, allowing for device emulation.
The biggest difference between VT-x and AMD-V is that AMD-V provides a more complete virtualization environment. VT-x requires the VMX non-root code to run with paging enabled, which precludes hardware virtualization of real-mode code and non-paged protected-mode software. This typically only includes firmware and OS loaders, but nevertheless complicates VT-x hypervisor implementation. AMD-V does not have this restriction.
Of course hardware virtualization is not perfect. Compared to software virtualization, the overhead of VM exits is relatively high. This causes problems for devices whose emulation requires high number of traps. One example is a VGA device in 16-color mode, where not only every I/O port access but also every access to the framebuffer memory must be trapped.
10.5. Paravirtualization Providers
Oracle VM VirtualBox enables the exposure of a paravirtualization interface, to facilitate accurate and efficient execution of software within a virtual machine. These interfaces require the guest operating system to recognize their presence and make use of them in order to leverage the benefits of communicating with the Oracle VM VirtualBox hypervisor.
Most modern, mainstream guest operating systems, including Windows and Linux, ship with support for one or more paravirtualization interfaces. Hence, there is typically no need to install additional software in the guest to take advantage of this feature.
Exposing a paravirtualization provider to the guest operating system does not rely on the choice of host platforms. For example, the Hyper-V paravirtualization provider can be used for VMs to run on any host platform supported by Oracle VM VirtualBox and not just Windows.
Oracle VM VirtualBox provides the following interfaces:
Minimal : Announces the presence of a virtualized environment. Additionally, reports the TSC and APIC frequency to the guest operating system. This provider is mandatory for running any Mac OS X guests.
KVM : Presents a Linux KVM hypervisor interface which is recognized by Linux kernels version 2.6.25 or later. Oracle VM VirtualBox’s implementation currently supports paravirtualized clocks and SMP spinlocks. This provider is recommended for Linux guests.
Hyper-V : Presents a Microsoft Hyper-V hypervisor interface which is recognized by Windows 7 and newer operating systems. Oracle VM VirtualBox’s implementation currently supports paravirtualized clocks, APIC frequency reporting, guest debugging, guest crash reporting and relaxed timer checks. This provider is recommended for Windows guests.
10.6. Nested Paging and VPIDs
In addition to normal hardware virtualization, your processor may also support the following additional sophisticated techniques:
Nested paging implements some memory management in hardware, which can greatly accelerate hardware virtualization since these tasks no longer need to be performed by the virtualization software.
With nested paging, the hardware provides another level of indirection when translating linear to physical addresses. Page tables function as before, but linear addresses are now translated to «guest physical» addresses first and not physical addresses directly. A new set of paging registers now exists under the traditional paging mechanism and translates from guest physical addresses to host physical addresses, which are used to access memory.
Nested paging eliminates the overhead caused by VM exits and page table accesses. In essence, with nested page tables the guest can handle paging without intervention from the hypervisor. Nested paging thus significantly improves virtualization performance.
On AMD processors, nested paging has been available starting with the Barcelona (K10) architecture. They now call it rapid virtualization indexing (RVI). Intel added support for nested paging, which they call extended page tables (EPT), with their Core i7 (Nehalem) processors.
If you have an Intel CPU with EPT, please consult Section 13.4.1, “CVE-2018-3646” for security concerns regarding EPT.
On Intel CPUs, a hardware feature called Virtual Processor Identifiers (VPIDs) can greatly accelerate context switching by reducing the need for expensive flushing of the processor’s Translation Lookaside Buffers (TLBs).
Nested paging virtualbox что это
3.7.1. Основные настройки
В окне настроек на вкладке «General», вы можете настроить основные свойства виртуальной машины, такие как память и необходимые аппаратные средства. Существует четыре вкладки : «Основные», «Дополнительно», «Описание» и «Прочее».
3.7.1.1. Вкладка «Основные»
Имя под которым ВМ показывается в списке виртуальных машин главного окна. Под этим именем, VirtualBox также сохраняет файл настроек ВМ. При изменении имени, VirtualBox изменяет также имя файла. В результате, вы можете использовать только символы которые используются в вашей ОС для наименования файлов.
Размер основной памяти (RAM)
Обычно, возможно изменить размер памяти после установки гостевой ОС (при условии что вы не уменьшите размер менее, чем требуется для ее загрузки).
Замечание
Так как механизм активизации Microsoft Windows чуствителен к изменениям аппаратной части, то если вам необходимо изменять свойства гостей Windows, имейте ввиду, что некоторые изменения могут инициировать запрос активации.
Размер памяти предоставляемой виртуальной графической карте в мегабайтах. Как и в случае с основной памятью, эта память будет выделена из основной памяти хоста. Размер видеопамяти влияет на доступные разрешения и глубину цветов, но в большинстве случаях, будет достаточно памяти указанной по умолчанию 8MB.
Включить 3D ускорение
Если для виртуальной машины установлены гостевые дополнения, вы можете указать зедесь, должен ли гость поддерживать аппаратное 3D графики. Ознакомтесь с деталями в Раздел 4.8, “Аппаратной 3D ускорение (OpenGL)”.
3.7.1.2. Вкладка «Дополнительно»
ACPI является современным стандартом для операционных систем по управлению питанием аппаратных устройств компьютера. Все современные компьютеры уже давно поддерживают этот стандарт, как с Windows так и с Linux, поэтому функция включается в VirtualBox по умолчанию.
Предупреждение
Замечание
Включение I/O APIC требуется для 64-bit гостей, особенно для Windows Vista.
Как бы то ни было, программная поддержка I/O APICs является ненадежной в ОС отличных от Windows. Также, использование I/O APIC увеличивает нагрузку на систему виртуализации, что приводит к замедлению работы гостевой ОС.
Предупреждение
Во всех ОС Windows, начиная с Windows 2000, устанавливаются различные ядра в зависимости от наличия I/O APIC. Как и с ACPI, I/O APIC также не должна отключаться после установки гостевой ОС Windows. Включение этой опции после установки не будет иметь никакого эффекта.
Эта настройка определяет, будет ли система виртуализации пытаться использовать расширения аппаратной виртуализации процессора. См. Раздел 1.2, “Программная и. аппаратная виртуализация (VT-x and AMD-V)”. Для 64-bit гостей и других «экзотических» систем, таких как OS/2, эта настройка должна быть включена. Начиная с версии VirtualBox 2.2, эта опция включена по умолчанию при создании новых ВМ.
Nested paging не включается автоматически когда вы включаете аппаратную виртуализацию; вы должны включить ее отдельно.
Замечание
Эта настройка определяет, будет ли виртуальная машина использовать PAE и NX. PAE расшифровывается как «Расширение физических адресов». Обычно когда эта опция включена и поддерживается операционной системой то даже на 32-bit x86 CPU возможен доступ к более чем 4 GB памяти. Это возможно вследствии добавления еще 4 bits к обычной 36 bits шине адресации памяти и позволяет использовать память до 64 GB.
Некоторым ОС (например Ubuntu Server) требуется установка PAE и без нее запуск виртуальной машины не возможен. Эта настройка не влияет на размер выделяемой памяти в виртуальной машине.
Общий буфер обмена
Если для ВМ установлены гостевые дополнения, вы можете выбрать здесь режим работы буфера обмена между гостем и хостом. Если выбрано «Двунаправленный», то VirtualBox всегда устанавливает одинаковое содержимое буфера для обоих систем. Если выбрано «Из основной в гостевую ОС» или «Из гостевой в основную ОС «, то буфер обмена будет содержать данные только одной системы.
Папка снимков системы
3.7.1.3. Вкладка «Описание»
Если хотите, здесь вы можете ввести текстовое описание вашей ВМ. Это не влияет на функции машины, но это поле удобно использовать для внесения заметок о настройках виртуальной машины и установленного программного обеспечения.
3.7.1.4. Прочие настройки
Если установлен флаг, VirtualBox будет сохранять состояния сменных носителей которые были подключены во время работы ВМ.
Настройка заставки BIOS
3.7.2. Жесткие диски
В окне настройки ВМ, на вкладке «Жесткие диски» можно подключить образы виртуальных жестких дисков к вашей ВМ:
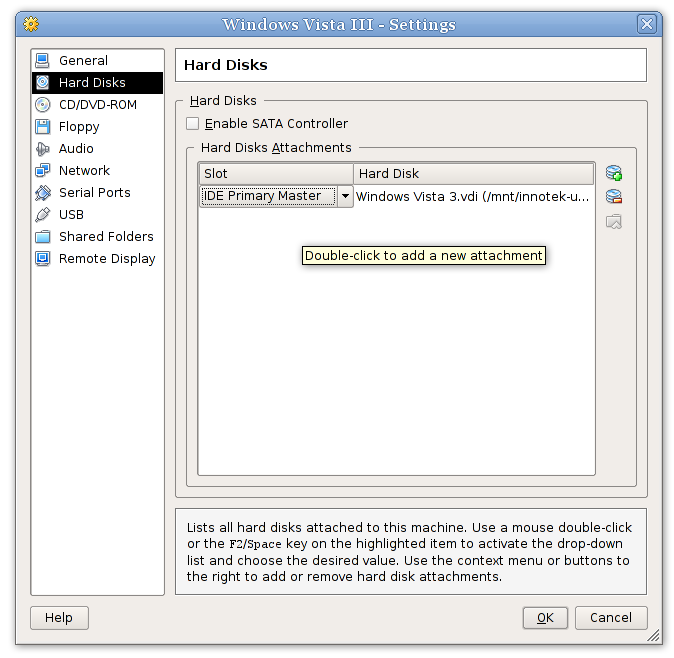 |
Настройка первого диска («Primary Master») производится в мастере «Создание ВМ». Как правило данная настройка сохраняется все время для ВМ. Однако вы можете свободно удалять, добавлять и менять эти настройки для виртуальных жестких дисков после создания ВМ. Например, если вы захотите скопировать какие либо файлы с другого виртуального диска, вы можете подключить этот диск как втрой жесткий диск.
В дополнение к IDE контроллеру, VirtualBox также предоставляет гостю SATA контроллер ; однако, для его поддержки требуется современная гостевая ОС. За подробностями обращайтесь к Раздел 5.1, «Контроллеры жестких дисков: IDE, SATA (AHCI), SCSI.
3.7.3. Настройка CD/DVD-ROM и дисковода гибких дисков
В окне настроек ВМ, эти две настройки предназначены для определения используемых в дискет и CD/DVD-ROM в гостевой ОС.
В обоих вкладках, если флажок «Подключить» сброшен, VirtualBox информирует гостя о том, что привод пуст. Иначе, если флажок «Подключить» установлен, становятся доступны следующие опции:
Физический привод : Физическое устройство хоста предоставляется ВМ, и гость может на него писать и читать с него. Это удобно, например, если вы хотите установить Windows с реального установочного CD. В этом случае выберите привод в выпадающем списке.
Для дискет, файл должен быть в формате raw.
Все эти настройки могут быть изменены в работающей гостевой системе. Так как диалог «Свойства» не доступен в этом режиме, вы можете получить доступ к этим настройкам через пункт меню «Устройства» в окне виртуальной машины.
Замечание
Наименование устройства предоставляемого гостю (которое в гостевой системе будет отображаться в утилитах настроек таких как Windows Device Manager) будет всегда «VBOX CD-ROM», независимо от текущей настройки виртуального привода. Это сделано для того, чтобы исключить срабатывания механизма поиска новых устройств в госте при изменении настроек ВМ.
К устройству хоста гостю, обычно, предоставляется доступ только на чтение. Гостю можно дать право на запись (но только данных, аудио не работает) CD/DVD хоста, но данная функция имеет статус экспериментальной:
Данная опция не допускает использование всех реальных возможностей устройства. Потенциально опасные команды блокируются (такие как обновления прошивки).
3.7.4. Настройки звука
Раздел «Аудио» окна настроек виртуальной машины определяет какие из ВМ будут видеть подключенные звуковые устройства и должен ли ауди выход прослушиваться хост системой.
Если ауди включено в госте, вы можете выбрать между эмуляцией контроллером Intel AC’97 и SoundBlaster 16 card. В любом случае, вы можете выбрать какой ауди драйвер VirtualBox будет использоваться на хосте.
На хосте host, в зависимости от настроек системы, вы можете выбрать между подсистемами OSS, ALSA или PulseAudio. В современных дистрибутивах Linux (Fedora8 and above, Ubuntu 8.04 and above) звуковая подсистема PulseAudio более предпочтительна.
3.7.5. Настройка сети
В разделе «Сеть» в окне настроек ВМ настраиваются какие сетевые карты VirtualBox будут доступны и как они будут функционировать.
Замечание
3.7.6. COM порты
VirtualBox имеет удобную для использования полную поддержку СОМ портов в виртуальных машинах. [ 9 ]
Если виртуальный последовательный порт подключен, к гостевой операционной системе подключается стандартный типовой 16450 последовательный порт. Поддерживается как прием так и передача данных. Настройка этого виртуального последовательного порта зависит от настроек операционной системы хоста.
В любом случае, вы можете настроить до двух портов одновременно. Для каждого устройства, вы можете указать
COM1: I/O base 0x3F8, IRQ 4
COM2: I/O base 0x2F8, IRQ 3
COM3: I/O base 0x3E8, IRQ 4
COM4: I/O base 0x2E8, IRQ 3
Вы можете указать VirtualBox подключить виртуальный порт к программному каналу (pipe) хоста. Этот режим зависит от ОС хоста:
В Mac, Linux или OpenSolaris хостах, используется локальный сокет. В Linux имеются различные инструменты которые позволяют подсоединиться к локальному сокету и работают в режиме сервера. Наиболее гибким инструментом является socat и который включен в множество дистрибутивов.
Вы можете настроить VirtualBox для создания нового именованного канала(локальныого сокета), или указать VirtualBox использование существующего канала (сокета). С помощью опций командной строки VBoxManage указывается режим «сервер» или «клиент».
Одновременно может быть настроено до двух последовательных портов для каждой ВМ, но вы можете указать большие номера портов. Например, вы можете настроить два порта доступные для гостя, как COM2 и COM4.
3.7.7. Поддержка USB
3.7.7.1. Поддержка USB
VirtualBox может предоставить прямой доступ виртуальных машин к устройствам USB хост системы. Для этого VirtualBox предоставляет гостевым системам контроллер USB. Как только гостевая система использующая USB запускается, устройство становится недоступным на хосте.
Замечание
Будте осторожны с устройствами которые используются в данный момент на хост системе! например, если вы подключите к гостю жесткий диск USB, используемый на хосте, то при активизации гостя, устройство будет отключено без использования механизмов безопасного отключения. Это может привести к потере данных.
Кликнете на кнопке «+» справа от окна «Фильтры устройств USB » для создания нового фильтра. Вы можете задать имя фильтра и определенные критерии. Чем больше критериев вы зададите тем будет точнее вероятность выбора нужного устройства. Например, если вы укажете код поставщика (vendor ID) равный 046d, все устройства произведенные Logitech будут доступны гостю. Если вы заполните все поля, фильтр будет применяться только к конкретной модели от конкретного производителя, исключая даже подобные устройства но с другим серийным номером.
Доступны следующие критерии фильтров:
В качестве альтернативы, вы можете указать «Производитель» и «Продукт» по имени.
Удаленный. Эта настройка предназначена для указания того, будет ли устройство подключаться как локальное, удаленное(через VRDP) или как то и другое.
На хосте Windows, вы должны отключить и переподключить USB устройство для использования, после создания фильтра к нему.
Например, можете создать новый USB фильтр и указать ID поставщика 046d (Logitech, Inc), индекс производителя = 1, и «не удаленное». В этом случае любое устройство USB в хост системе, произведенное Logitech, Inc с a индексом производителя 1 будет доступно в гостевой системе.
Вы можете отключить фильтр без удаления, кликнув на флажке перед именем фильтра.
3.7.7.2. Замечания к реализациям в Windows и Linux системах
3.7.8. Общие папки
3.7.9. Удаленный экран
[ 9 ] Поддержка COM портов добавлена в VirtualBox 1.5.


